
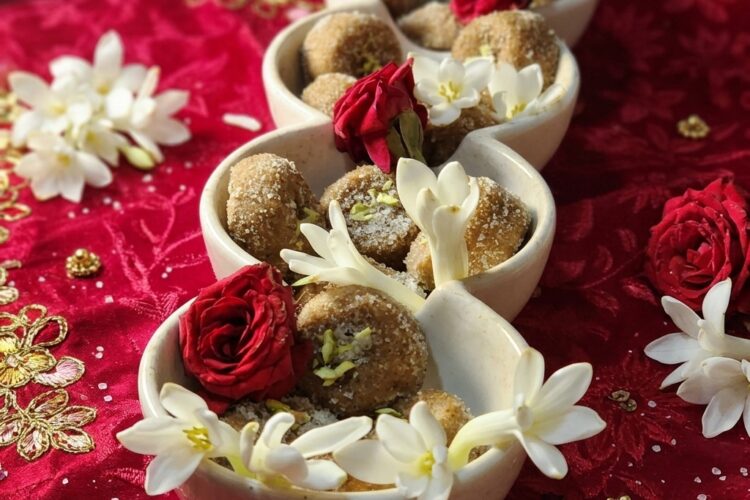
Mathura Peda is one of the most famous traditional Indian sweets from Mathura, Uttar Pradesh. Made with khoya, sugar, and cardamom, this classic peda has a rich, slightly grainy texture and a deep caramelized milk flavor.
Whenever I think of Mathura, I think of its temples, its beautiful traditions, and, of course, the famous peda sold in local sweet shops. This Mathura Peda Recipe is my way of bringing that traditional mithai flavor into the home kitchen.
Unlike soft milk peda, traditional Mathura peda is darker in color because the khoya is cooked slowly until it becomes deeply roasted. As a result, the peda develops its characteristic brown color and rich, nutty aroma.
What Makes Mathura Peda Special?
The secret to authentic Mathura Peda is simple: good-quality khoya and patient cooking.
First, the khoya is slowly roasted until it changes from pale to golden brown. Then, powdered sugar and cardamom are added. Finally, the mixture is shaped into small round pedas.
Therefore, there is no need for many ingredients. The traditional flavor comes mainly from properly roasted khoya.
Ingredients for Mathura Peda
- 500 g khoya (mawa), preferably unsweetened and firm
- ¾ to 1 cup powdered sugar, adjust to taste
- ½ teaspoon cardamom powder
- 1–2 tablespoons milk, only if needed
- 1 tablespoon ghee, optional
- 2–3 tablespoons powdered sugar, for coating
How to Make Mathura Peda
Step 1: Crumble the Khoya
First, crumble the khoya into small pieces.
Use a heavy-bottomed pan or kadai. If your khoya is very dry, you can add a small amount of ghee. However, traditional Mathura peda does not require a large amount of ghee.
Step 2: Roast the Khoya
Place the pan over low to medium heat and add the crumbled khoya.
Now begin roasting it slowly. Stir continuously so that the khoya does not stick to the bottom of the pan.
As it cooks, the khoya will gradually soften and then begin to change color.
Continue roasting until it becomes deep golden brown to light brown and develops a rich, roasted aroma.
This step is the heart of an authentic Mathura Peda Recipe, so do not rush it.
Step 3: Cool the Roasted Khoya
Once the khoya is nicely roasted, turn off the heat.
Transfer it to a bowl and allow it to cool until it is warm rather than hot.
This is important because adding sugar while the khoya is extremely hot can make the mixture watery.
Step 4: Add Sugar and Cardamom
Next, add powdered sugar and cardamom powder to the warm roasted khoya.
Mix everything thoroughly.
If the mixture feels too dry to shape, add 1 tablespoon of milk at a time and mix again. Use only enough milk to bring the mixture together.
However, avoid adding too much liquid because Mathura peda should have a firm, slightly grainy texture.
Step 5: Shape the Mathura Peda
Once the mixture is cool enough to handle, take a small portion and roll it between your palms.
Flatten it gently to form a traditional round peda.
Repeat with the remaining mixture.
Step 6: Coat with Sugar
Finally, place a little powdered sugar on a plate.
Roll each peda lightly in the sugar so that the outside gets a delicate coating.
You can also press a small indentation in the center of each peda for a traditional appearance.
Your homemade Mathura Peda is ready!
Tips for Authentic Mathura Peda
Roast the Khoya Slowly
The roasted flavor is what makes Mathura peda different from many other peda varieties. Therefore, cook the khoya patiently over low to medium heat.
Don’t Add Too Much Sugar
Start with ¾ cup powdered sugar and taste the mixture after combining. You can add more if you prefer a sweeter peda.
Be Careful With Milk
Milk is only needed if the mixture is too dry to shape. Otherwise, skip it.
Use Fresh Khoya
For the best flavor and texture, use fresh, good-quality unsweetened khoya.
Don’t Shape While Too Hot
Allow the mixture to cool until it is warm enough to handle. If it is too hot, the sugar can melt and make shaping difficult.
How to Store Mathura Peda
Place the prepared pedas in a clean airtight container.
Because homemade peda contains khoya, keep it refrigerated if you are storing it for more than a short period.
For the best taste and texture, enjoy the pedas fresh.
When to Serve Mathura Peda
Mathura peda is perfect for:
- Janmashtami
- Diwali
- Holi
- Raksha Bandhan
- Pooja and prasad
- Family celebrations
- Indian festive gatherings
- Homemade sweet boxes
It also makes a thoughtful homemade gift during festivals and special occasions.
Frequently Asked Questions
Why is Mathura Peda brown?
Traditional Mathura peda gets its characteristic brown color from slowly roasting the khoya. The longer it is carefully roasted, the deeper the color and richer the flavor become.
Can I use milk powder instead of khoya?
You can make peda using milk powder, but it will not have the same traditional taste and texture as authentic Mathura peda made with khoya.
Can I use granulated sugar?
Powdered sugar is preferable because it blends more easily with the roasted khoya.
How long does homemade Mathura Peda last?
Because khoya is a dairy product, homemade peda should be stored properly in the refrigerator. For the best quality, consume it within a few days.
Final Thoughts
This Mathura Peda Recipe is a simple yet special Indian sweet that celebrates the traditional flavors of Mathura. The recipe uses just a handful of ingredients; however, the slow roasting of the khoya creates an incredibly rich aroma and authentic taste.
So, whenever you are craving a traditional Indian mithai, try making these homemade Mathura pedas. Serve them during a festival, offer them as prasad, or simply enjoy one with a cup of tea.
A little patience is all you need to create this delicious taste of Mathura in your own kitchen. ❤️